

- peopleLLC
What Are the Most Common Mistakes Homeowners Make When Replacing Plumbing Fixtures?
Quick Answer: Common plumbing fixture replacement mistakes include failing to shut off the water supply properly, overtightening plumbing connections, using incorrect fittings or sealants, and overlooking small leaks after installation. Homeowners may also damage pipes by using harsh chemical drain cleaners, flushing inappropriate items down toilets, or attempting complex plumbing repairs without the necessary knowledge or tools. Professional plumbers often emphasize that fixture replacement involves more than simply attaching a new faucet or toilet. Proper installation requires attention to details such as compatible supply lines, correctly sealed threaded connections with PTFE plumber’s tape, balanced tightening of compression fittings, and thorough leak testing once the fixture is installed. Did You Know? Even a slow drip from a poorly sealed plumbing connection can waste hundreds of gallons of water per year, which is why plumbers always perform a careful leak inspection after installing new fixtures. |
Replacing plumbing fixtures such as faucets, sinks, toilets, or showerheads often seems like a straightforward home improvement task. Many homeowners attempt these upgrades themselves to refresh a bathroom or kitchen without the cost of hiring a professional plumber. However, even simple fixture replacements involve several technical steps, and small installation mistakes can quickly lead to leaks, poor water flow, or damage to the plumbing system.
One of the most common challenges is underestimating the number of components involved in a fixture installation. Supply lines, shut-off valves, compression fittings, threaded connections, and drain assemblies must all align correctly for the fixture to function properly. When any of these elements are installed incorrectly or sealed improperly, the result can be hidden water leaks or reduced fixture performance.
Professional plumbers often emphasize that careful preparation, proper tools, and attention to detail are essential during fixture replacement. Understanding the most common mistakes homeowners make, such as overtightening connections, using incorrect sealants, or ignoring small leaks, can help prevent costly repairs and ensure the new plumbing fixture operates safely and efficiently.
Did You Know?
According to water conservation studies, household leaks account for nearly 10,000 gallons of wasted water per year in many homes, and poorly installed fixtures are one of the most common sources of these leaks.
Why Do Plumbing Fixture Replacement Projects Often Go Wrong?
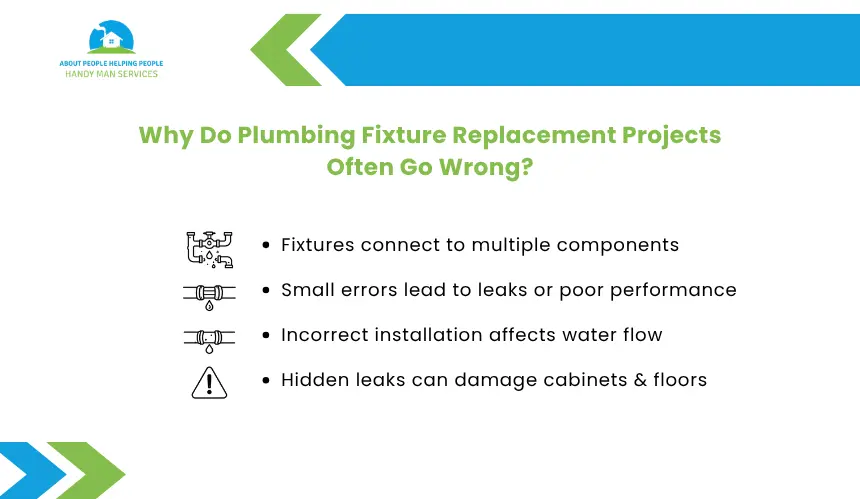
Many plumbing fixture replacements seem simple at first, but they can become problematic when homeowners underestimate how plumbing systems function. Fixtures such as faucets, toilets, and sinks are connected to multiple components, including supply lines, shut-off valves, drain assemblies, and threaded fittings. If any part of this system is installed incorrectly, the fixture may leak, clog, or perform poorly.
How Does Underestimating Plumbing System Complexity Lead to Problems?
Plumbing systems operate under constant water pressure, which means even a small installation error can quickly lead to leaks. Fixtures connect to both water supply lines and drainage pipes, and each connection must be sealed correctly to prevent water from escaping.
For example, a faucet installation involves several parts working together:
- Angle stop valves that control water flow
- Flexible supply hoses connecting the faucet to the water line
- Threaded fittings that require proper sealing
- Mounting hardware that secures the fixture to the sink or countertop
If any of these components are misaligned or improperly tightened, the fixture may not function correctly.
Did You Know?
Many modern fixtures rely on compression fittings and rubber gaskets to create watertight seals, so overtightening or misaligning these components can damage them.
Why Are Fixture Installations Different From Basic Plumbing Repairs?
Replacing a fixture often involves more than simply swapping out one component for another. New fixtures may have different connection sizes, mounting systems, or supply line configurations compared to the original installation.
For example, some modern faucets use integrated mounting plates or specialized supply hoses that require careful alignment. If homeowners attempt to force connections that do not match the existing plumbing setup, leaks or structural damage may occur.
Why Can Small Installation Errors Lead to Bigger Plumbing Issues?
Small mistakes during installation can create problems that are not immediately visible. A slightly loose connection, poorly applied plumber’s tape, or misaligned drain fitting may allow water to escape slowly over time.
These slow leaks can damage cabinets, flooring, and wall materials before the issue becomes noticeable. Because plumbing fixtures are often installed inside enclosed spaces such as vanity cabinets, minor leaks may remain hidden until significant water damage occurs.
Did You Know?
Slow leaks beneath sinks are one of the most common causes of cabinet water damage, because the moisture can accumulate gradually without being detected right away.
1. Why Is Failing to Shut Off the Water Supply a Costly Mistake?
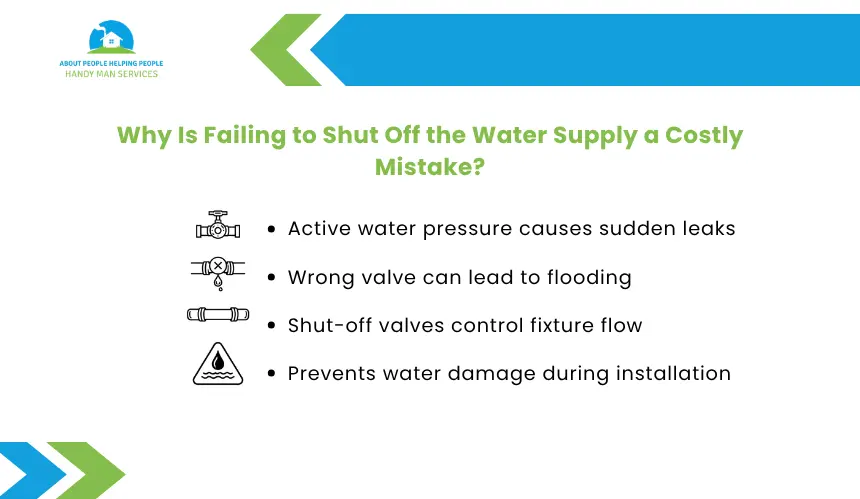
One of the most basic yet critical steps when replacing plumbing fixtures is turning off the water supply. Skipping this step or shutting off the wrong valve can quickly lead to water spills, flooding, and damage to surrounding areas such as cabinets, floors, or walls.
Before removing any plumbing fixture, it is important to shut off the water supply to the fixture being replaced.
How Do You Locate Fixture Shut-Off Valves?
Most plumbing fixtures have dedicated shut-off valves, often called angle stop valves, located beneath sinks or behind toilets. These valves allow homeowners to stop water flow to a specific fixture without shutting off the entire home’s water supply.
The process usually involves turning the valve handle clockwise until it stops. Once closed, the fixture should be turned on briefly to confirm that water is no longer flowing.
Did You Know?
Angle stop valves are designed to isolate water flow to individual fixtures, which helps prevent water damage during repairs or replacements.
When Should the Main Water Shut-Off Valve Be Used?
In some homes, fixture shut-off valves may be missing, damaged, or stuck due to mineral buildup. In these situations, the main water shut-off valve must be used instead. This valve typically controls water flow for the entire home and is often located near the water meter or where the main water line enters the house.
Turning off the main supply ensures that water pressure is removed from all pipes before installation begins.
How Does Shutting Off Water Prevent Damage?
Even a small amount of water pressure in a pipe can cause water to spray when supply lines are disconnected. By shutting off the correct valves and relieving pressure in the fixture, homeowners can safely remove old components without unexpectedly releasing water.
Taking this step also makes it easier to install new supply lines and fittings without dealing with active water flow.
Did You Know?
Professional plumbers often keep a bucket or towel nearby when disconnecting supply lines because residual water inside the pipes may still drain out even after the valve is closed.
2. How Can Using the Wrong Plumbing Components Cause Installation Failures?
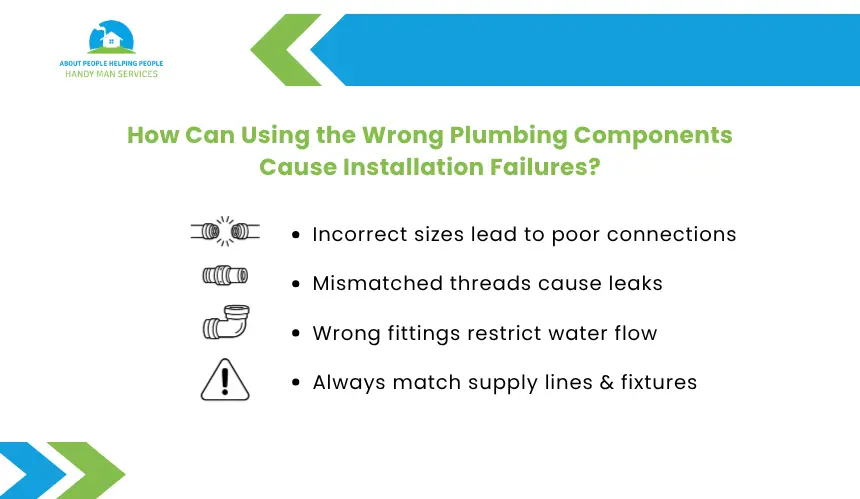
Another common issue during plumbing fixture replacement is using incompatible parts or fittings. Many fixtures connect to supply lines and drain systems that vary in size, thread type, or connection method. When the wrong components are used, it can lead to poor sealing, restricted water flow, or leaks at connection points.
Why Do Supply Line Connections Need to Match Exactly?
Water supply lines deliver pressurized water to fixtures such as faucets and toilets. These lines must connect securely to both the fixture and the shut-off valve using the correct thread type and diameter.
Modern fixtures often use flexible braided supply hoses, while older plumbing setups may rely on rigid copper tubing or compression fittings. If the connector size or thread style does not match the existing plumbing, homeowners may attempt to force the connection, which can damage the threads or prevent a proper seal.
Did You Know?
Most faucet supply lines use 3/8-inch compression fittings, while toilet supply lines often connect to 7/8-inch ballcock fittings, making correct sizing essential during installation.
How Can Incompatible Thread Types Cause Leaks?
Plumbing fixtures commonly use different thread standards depending on the component. For example, some fittings rely on compression threads, while others use pipe threads (NPT) that require sealing with PTFE plumber’s tape.
If the wrong type of connection is used, the joint may not seal properly, even if it feels tight. This can lead to slow leaks that develop after the fixture is installed.
Why Is Fixture Compatibility Important?
Not all fixtures are designed to work with every plumbing configuration. Differences in mounting hardware, supply line length, or drain alignment can create installation challenges.
For example, replacing an older faucet with a modern model may require new supply hoses or mounting brackets to fit the sink correctly. Checking compatibility before installation helps prevent unnecessary adjustments or plumbing modifications.
Did You Know?
Many plumbing manufacturers include adapter fittings and mounting hardware with new fixtures specifically to accommodate different plumbing configurations.
3. Why Can Excessive Tightening Damage Plumbing Connections?
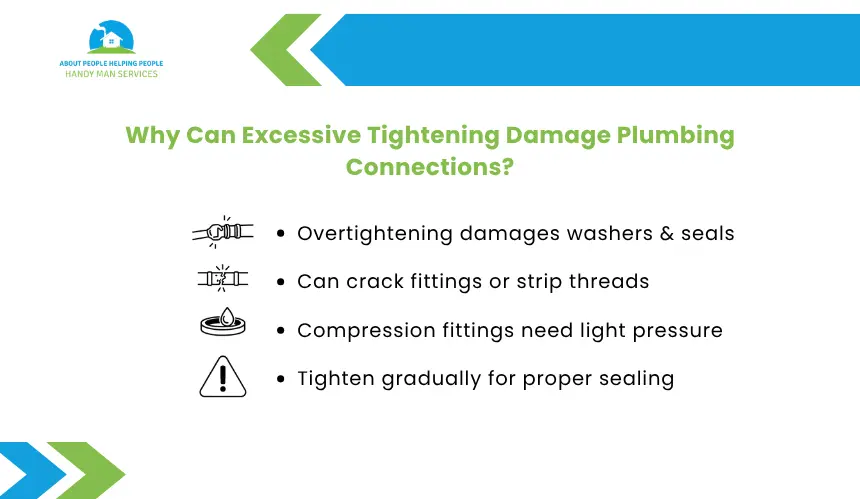
A common mistake during plumbing fixture replacement is tightening fittings too aggressively. Many homeowners assume that tightening a connection as much as possible will prevent leaks. However, most plumbing connections rely on washers, gaskets, or compression rings to create a seal, and applying too much force can damage these components.
How Do Compression Fittings and Washers Create a Seal?
Many fixtures use compression fittings, which include a compression nut, a compression ring (also called a ferrule), and the pipe or supply line. When the nut is tightened, the compression ring presses against the pipe, forming a watertight seal.
Similarly, many faucet and supply line connections use rubber washers or gaskets that seal the connection when lightly compressed. These sealing elements are designed to work with moderate pressure rather than excessive tightening.
Did You Know?
Compression fittings seal by squeezing the ferrule against the pipe, which means overtightening can actually deform the ring and reduce its ability to create a watertight seal.
What Problems Can Occur From Overtightening?
Applying too much force when tightening plumbing connections can cause several issues:
- cracked plastic fittings or faucet components
- stripped threads on metal connectors
- flattened or damaged rubber washers
- distorted compression rings that no longer seal properly
Once these components are damaged, the connection may begin to leak even if the fitting appears tight.
What Is the Proper Way to Tighten Plumbing Connections?
Professional plumbers often follow a simple guideline when tightening plumbing fittings. Most connections should be tightened by hand first, then secured slightly with a wrench until the fitting feels snug.
If a leak appears after turning the water back on, the connection can be tightened slightly more. This gradual approach helps prevent damage to the fittings while still ensuring a secure seal.
Did You Know?
Many faucet manufacturers specifically recommend tightening supply line connections only a quarter-turn past hand-tight, because this is usually enough to compress the sealing washer without damaging it.
4. How Do Incorrect Sealants Lead to Plumbing Leaks?
Using the wrong sealing method is another frequent problem during plumbing fixture replacement. Many plumbing connections rely on proper sealants to prevent water from escaping through threaded fittings. If the wrong sealant is used or applied incorrectly, the connection may slowly leak even if the fitting appears tight.
How Should PTFE (Plumber’s) Tape Be Applied?
PTFE tape, commonly called plumber’s tape, is used to seal threaded pipe connections. It fills small gaps between the threads and helps create a watertight seal.
For proper application, the tape should be wrapped around the male threads in the same direction that the fitting will tighten. Typically, two or three wraps of tape are sufficient to create an effective seal.
Did You Know?
Wrapping plumber’s tape in the wrong direction can cause it to unravel as the fitting is tightened, which reduces its sealing ability.
When Should Thread Sealant or Pipe Dope Be Used?
Some plumbing connections work better with thread sealant (pipe dope) rather than PTFE tape. Pipe thread compounds create a thicker seal that fills larger gaps in threaded connections.
This sealant is often used on metal pipe threads to provide a stronger seal. However, it is not always necessary for compression fittings or connections that rely on rubber washers.
What Common Sealant Mistakes Cause Slow Leaks?
Several mistakes can prevent plumbing sealants from working properly:
- Applying too little or too much plumber’s tape
- Using tape on connections that require rubber washers
- Mixing incompatible sealants on the same connection
- Installing threaded fittings without any sealant at all
These issues can allow small amounts of water to escape over time, leading to slow leaks that may not be immediately noticeable.
Did You Know?
Many slow plumbing leaks develop because threaded fittings were assembled without proper sealing, allowing pressurized water to seep through microscopic gaps in the threads.
5. Why Is Ignoring Minor Leaks a Serious Plumbing Problem?

Small leaks are often overlooked during plumbing fixture replacement, especially if the drip appears slow or intermittent. However, even minor leaks can gradually lead to structural damage, mold growth, and increased water bills. Addressing leaks immediately after installation is essential to ensure the fixture operates correctly and safely.
How Can Small Drips Cause Long-Term Damage?
A slow drip from a faucet connection or supply line may seem harmless at first, but over time, it can release a significant amount of water. When leaks occur beneath sinks or inside cabinets, moisture can accumulate in hidden areas, where it may damage wood, drywall, or flooring.
Continuous exposure to moisture can also encourage mold growth, which may affect indoor air quality and require costly remediation.
Did You Know?
A faucet that drips once per second can waste over 3,000 gallons of water per year, according to water conservation estimates.
Why Are Hidden Leaks Common Under Fixtures?
Plumbing fixtures are often installed inside enclosed spaces such as bathroom vanities or kitchen cabinets. Because these areas are not regularly inspected, slow leaks may go unnoticed for long periods.
Supply line connections, compression fittings, and threaded joints are common points where hidden leaks may develop if the installation was not sealed properly.
Why Is Leak Testing Important After Installation?
Professional plumbers always perform a leak test after installing a new fixture. This process involves turning the water supply back on and carefully inspecting all connections while the fixture is running.
Checking both supply lines and drain connections helps ensure that water is flowing correctly and that no slow leaks are present. Taking a few minutes to test the installation can prevent significant damage later.
Did You Know?
Plumbers often place a dry paper towel beneath supply line connections during leak testing because even a tiny drip will quickly show up on the paper.
6. How Can Improper Drain Use Damage Newly Installed Fixtures?
Even after a new plumbing fixture is installed correctly, improper use of the drain can quickly cause problems. Many homeowners unintentionally damage toilets and drain lines by flushing or disposing of materials that plumbing systems are not designed to handle. These materials can cause clogs, slow drainage, or pressure buildup inside pipes.
What Items Should Never Be Flushed Down a Toilet?
Toilets are designed to flush only human waste and toilet paper. Flushing other materials can cause blockages because these items do not break down easily in water.
Common items that should never be flushed include:
- Paper towels or tissues
- “Flushable” wipes
- Feminine hygiene products
- Cotton swabs or cotton pads
- Dental floss
These materials can accumulate inside the drain line and eventually form clogs that affect the entire plumbing system.
Did You Know?
Many products labeled as “flushable wipes” do not dissolve like toilet paper, which is why they are a leading cause of household plumbing clogs.
How Do Foreign Materials Block Drain Lines?
Drain pipes are designed to carry wastewater and small amounts of dissolvable material. When solid or fibrous materials enter the system, they can snag on rough areas inside the pipes or collect around bends in the plumbing.
Over time, additional debris may accumulate around these materials, creating a blockage that restricts water flow.
Why Is Proper Drain Use Important After Installing Fixtures?
New plumbing fixtures often rely on precise water flow and drainage performance. When drains become partially blocked, water may drain slowly or back up into sinks or toilets.
Maintaining proper drain habits helps ensure that the fixture continues to operate as intended and prevents unnecessary plumbing repairs.
Did You Know?
Clogs caused by non-flushable materials can sometimes travel beyond household pipes and contribute to sewer system blockages, which are costly for municipalities to remove.
7. Why Are Chemical Drain Cleaners Harmful to Plumbing Systems?
When drains become slow after installing new fixtures, many homeowners turn to chemical drain cleaners as a quick solution. While these products may temporarily clear minor clogs, they can also cause damage to plumbing systems over time. The harsh chemicals used in these cleaners are designed to dissolve organic material, but they can also weaken pipes, seals, and fixture components.
How Do Chemical Drain Cleaners Affect Plumbing Pipes?
Most chemical drain cleaners contain strong substances such as sodium hydroxide or sulfuric acid. These chemicals generate heat as they react with clogs, which can soften or corrode certain types of plumbing materials.
Pipes made from PVC, older metal piping, or rubber seals inside fixtures may deteriorate when repeatedly exposed to these chemicals. Over time, this damage can lead to leaks or weakened pipe joints.
Did You Know?
Chemical drain cleaners can reach temperatures high enough to soften plastic pipes, which may cause the pipe to warp or weaken.
Why Can Chemical Cleaners Damage Fixture Components?
Fixtures such as sinks and bathtubs often contain metal finishes and internal seals that are not designed to withstand highly corrosive chemicals. If drain cleaners remain inside the fixture for too long, they can damage internal components or discolor the fixture surface.
Additionally, these chemicals may remain trapped inside partially clogged pipes, increasing the risk of corrosion.
What Are Safer Ways to Clear Minor Drain Clogs?
Instead of relying on harsh chemicals, plumbing professionals often recommend safer alternatives for clearing minor blockages. These methods include:
- Using a plunger to loosen clogs
- Removing debris with a drain snake or auger
- Flushing the drain with hot water and mild detergent
These approaches can clear many common clogs without introducing corrosive substances into the plumbing system.
Did You Know?
Professional plumbers often use mechanical tools such as hand augers or drain snakes, which remove clogs physically rather than relying on chemical reactions.
When Should You Leave Plumbing Repairs to a Professional?
While replacing simple fixtures can sometimes be handled as a DIY project, certain plumbing situations require professional expertise. Attempting complex repairs without a clear understanding of plumbing systems can lead to leaks, pipe damage, or violations of local plumbing codes.
What Makes Some Fixture Installations More Complicated?
Certain plumbing fixtures involve more complex connections than standard faucet or showerhead replacements. For example, installing a new toilet, garbage disposal, or shower valve may require adjustments to water supply lines, drain pipes, or mounting hardware.
These installations often involve aligning multiple components correctly and ensuring proper sealing under water pressure. Without the right tools or experience, achieving a reliable installation can be difficult.
Did You Know?
Shower valve replacements often require access to plumbing behind the wall, so improper installation can lead to hidden leaks in wall cavities.
Why Do Local Plumbing Codes Matter?
Many municipalities enforce plumbing codes that regulate how fixtures must be installed. These codes are designed to ensure safe water flow, proper drainage, and protection against contamination.
Professional plumbers are familiar with these regulations and know how to install fixtures in compliance with local requirements. Ignoring plumbing codes may lead to issues during home inspections or future renovations.
How Can Professional Installation Prevent Long-Term Damage?
Experienced plumbers are trained to identify potential problems before they occur. They can detect issues such as worn shut-off valves, outdated supply lines, or improper pipe alignment that may not be obvious during a DIY installation.
By addressing these concerns during fixture replacement, professionals help ensure the plumbing system remains reliable and durable over time.
Did You Know?
Many professional plumbing installations include a post-installation pressure and leak test to verify that all connections are sealed correctly before the job is completed.
Frequently Asked Questions
Can homeowners replace plumbing fixtures themselves?
Homeowners can often replace basic plumbing fixtures such as faucets or showerheads if they have the correct tools and follow installation instructions carefully. However, more complex installations involving drain lines, valves, or water supply modifications may require professional plumbing knowledge.
Why does a new faucet leak after installation?
A newly installed faucet may leak if supply line connections are not sealed properly, washers or gaskets are misaligned, or threaded fittings were assembled without plumber’s tape or sealant. Even slightly loose compression fittings can allow water to drip once water pressure is restored.
What tools are needed to replace plumbing fixtures?
Common tools used during fixture replacement include an adjustable wrench, basin wrench, plumber’s tape (PTFE tape), screwdrivers, and a bucket or towel to catch residual water. Some installations may also require pliers or a drain wrench for removing old drain assemblies.
How long does it usually take to replace a plumbing fixture?
Replacing a basic fixture such as a faucet or showerhead may take about one to two hours if the plumbing connections are accessible and compatible with the new fixture. More complex installations, such as toilet repairs, sink drain replacements, or valve replacements, may require additional time.
When should a professional plumber be called?
A professional plumber should be contacted if the installation involves hidden plumbing, pipe modifications, recurring leaks, or unfamiliar fittings. Professional assistance may also be necessary if shut-off valves are damaged or if the plumbing system does not match the new fixture’s requirements.